A Review: Modern Toilet Restaurant, Ximending, Taipei

Who wouldn’t recognize Modern Toilet and their creative (nasty!) presentation of food?  It took me more than 10 blocks to finally find their Ximending branch! This toilet hanging from the building exterior (a unique “landmark” I should say) is hidden in a small alley along Xining Road. It is located behind a parking building and beside a 711.

You'll definitely know you found it when you see that toilet!

You’ll definitely know you found it when you see that toilet!

We went there for early lunch before it actually gets full. It is located at the 2nd floor of the building where you’ll be greeted by these toilet collection before you go up the stairs.

Me and my mom stop for a photo op!

Me and my mom stop for a photo op!

The restaurant is pretty small. If my memory serves me right, maybe only a total of 50 people can be seated at the same time. We settled for a table beside the window so we can experience the toilet chairs. It was a little uncomfortable at first, but my fascination eventually took over.

table

The menu samples some common Asian food out there. You have to fill up a form prior to ordering. We got ourselves a set of Hotpot good for sharing for 2-3 people, Chicken curry set, and some Thai Chicken Wings. We upgraded our meals to get the Urinals with Kiwi juice (which we can take home) and ice cream for dessert.

Menu

order form

Hotpot

Hotpot

Chicken Curry - don't be fooled by the size of the toilet. The actual plate is shallow and only good for 2 people.

Chicken Curry – don’t be fooled by the size of the toilet. The actual plate is shallow and only good for 2 people.

Thai Chicken Wings

Thai Chicken Wings

Free urinal when you upgrade to Kiwi juice and it actually tastes so good!

Free urinal when you upgrade to Kiwi juice and it actually tastes so good!

Chocolate Ice Cream

Chocolate Ice Cream

The food was a notch better than “OK”. But, in a place like this, the theme caps off everything. It was very well-thought of. You’d find a lot of toilet merchandise on sale. I was blown away by how realistic all those brown squishy things look like. We gave in and bought a toilet lighter for my dad.

merch

squishy

merch 2

The bathroom was also unique. Of course, you’ll find a toilet turned into a sink where you’ll wash your hands.

sink

Customer service was really good. The staff speak very good English explaining all the how-to’s from the menu to the merchandise and all. I guess this is because they expect a lot of tourists (and TV shows) to dine here. They were already featured a lot of times in a number of travel shows.

My overall experience was great! My verdict is 4 out of 5. They really lived up to their toilet theme and the staff were very pleasant. I find the food quite ordinary for my taste. I could find the same (or better) options elsewhere. But still, I’d say the meal was hearty, satisfying, and reasonably priced. Highly recommended for anybody visiting Taiwan. 🙂

Complete Address:

2F., No. 7, Ln. 50, Xining S. Rd., Wanhua Dist.,

Taipei City 108, Taiwan (R.O.C.)

Tel: (02) 23118822

A Review: Din Tai Fung, Taipei 101

I was introduced to Xiao Long Bao late – as in 2014 kind-of-late. After seeing it in my Facebook and Instagram feeds, I finally gave in and tried it out in a couple of Chinese restaurants in Manila. However, I guess nothing compares to trying THE authentic one right here where it all began, Din Tai Fung in Taiwan.

I explicitly wrote in my itinerary to drop by their Taipei 101 branch by hook or by crook. I knew it was non-negotiable and I was right. It was one of my best experiences in Taipei. 🙂

It is located at the lower ground floor of Taipei 101 mall near the exit leading to the MRT. We were there passed 6PM and the queue outside is quite intimidating . I was expecting more than an hour wait for a table. I went to the reception area to get a number, and to my surprise, we were called back after more or less 15 minutes (not bad!).

Queue of people while waiting for their numbers.

Queue of people while waiting for their numbers.

The restaurant is spacious! We were led to a table farther inside passing by the exposed kitchen where they make all the Xiao Long Baos! It was pretty cool!

Kitchen as seen through a glass window.

Lots of chefs making Xiao Long Bao as seen through a glass window.

The menu is a collection of various types of Xiao Long Bao, Dumplings, Shumai (Siomai), and Buns. There are also heavier options but we opted to get only the Dimsum platters. These are what we came for anyway.

The classic Pork Xiao Long Bao is a winner. The wrap is firm,  it was so easy to pick up without breaking.  The broth inside is even better when I found a huge chunk of pork waiting for me to chew on. 🙂

Pork Xiao Long Bao

Pork Xiao Long Bao

I originally planned of getting the Pork and Shrimp Siomai as seen in most food blogs. But, I got confused on getting Pork and Shrimp dumpling instead. It tasted ok, but seems like everything else tasted like Xiao Long Bao. LOL.

Pork and Shrimp Dumplings

Pork and Shrimp Dumplings

We also tried their Pork Buns, which I think was another redundant idea. But, it was good. I just prefer the Tim Ho Wan version better.  To cap off the meal, we got Taro buns. It was so good that I forgot to take a picture! 😛 But think of it as warm freshly cooked Yam in  steamed buns.

Pork Buns (less 1 eaten piece! :P)

Pork Buns (less 1 eaten piece! :P)

The service was top notch! The lady that served us made sure that we eat their Xiao Long Baos the right way. She demonstrated how to make the sauce – 2 parts soy sauce, 1 part vinegar over fresh ginger. We also literally never seen the bottom of our tea cups. Someone would come every 5 minutes checking and refilling our cups! Talk about hot tea overload! LOL.

Checking out is self service. You just need to bring your bill to the counter at the exit (the same way you came in). On your way, you’ll notice this corner explaining how they make their chopsticks. I think they also put these on sale.

Lady carefully checking each chopsticks.

Lady carefully checking each chopsticks.

Din Tai Fung Chopsticks

Din Tai Fung Chopsticks

The verdict? 4.5 out 5 – and I guess I’d give it a 5 if not because of my mistake in getting almost all things pork. Customer Service is great and so efficient. I heard they’ll soon open a branch in Manila. Maybe the self-service check-out would not work knowing the Filipino culture and all. But, I just hope that all other things would be at par as this Taiwanese experience. 🙂

A Review: Neijiang Hotel, Ximending, Taipei

Our flight to Taipei was in the 1st weekend of January and I knew very well that we needed to arrange for our Taiwan visas and authorizations earlier than normal. But, with the hectic holiday schedule, we only completed our visa requirements late and got our passports a day before we left. Whew!

This last-minute “GO” signal had me booking for our hotel late as well (as in 2 days before our flight!). Thank God for Agoda.com! I found Neijang Hotel, a modest 3-star hotel in Ximending. Apart from the fact that the more famous hotels are already fully booked, Neijiang Hotel is only one of the few which offers a Quad room that allows an extra bed for a fifth person. Front desk is also open 24 hours and hotel is located  right beside the Red House, only  5 minutes walk from Ximen MRT station. This is great news for those flying via Cebu Pacific arriving late from the midnight flight!

Neijiang Hotel is the 6-storey building with red sign board right across the pedestrian lane in the photo. Simending MRT station is 5-minute walk to the left.

Neijiang Hotel is the 5-storey building with red sign board right across the pedestrian lane in the photo. Ximending MRT station is 5-minute walk to the left.

Hotel lobby.

Hotel lobby. There is a public desktop you can use for free.

Small elevator that can fit 5 persons max.

Small elevator that can fit 5 persons max.

We arrived at 2AM and check-in was very fast. We were given a key to a room in the 5th floor. The keys were a bit bulky and we needed to surrender them every time we go out. Well, I think it’s about time they upgrade to proximity cards. 😛 The elevator also is very small, tightly fitting the 5 of us with our luggage. Nonetheless, we found the room spacious, still with enough walking space despite the extra bed.

Quad room with extra bed.

Quad room with extra bed.

The room comes with 2 comfy queen beds, but the extra bed was a bit hard with only a thin mattress over a wooden board.  It also has the basic amenities: a 32″ LCD TV (with English channels), a small fridge, a water heater plus complimentary coffee, towels, and basic toiletries. The only thing missing maybe, is a drinking water dispenser. We had to go to the nearby 7-11 to buy bottled water everyday.

The bathroom was also spacious and clean, but we had an issue  with the bathroom glass door with no locks! I forgot to ask the front desk to give us a room with wooden bathroom doors instead. Anyway, we made it work for 4 nights by hanging towels on the door when it’s occupied. LOL.

Water heater with Chinese labels. We eventually figured it out by trial and error. :P

Water heater with Chinese labels. We eventually figured it out by trial and error. 😛

Glass bathroom door - you can see the silhouette of people inside!

Glass bathroom door – you can see the silhouette of people inside!

The breakfast that comes with the room rate wasn’t something to be excited about. Every morning, you’ll find a plastic bag hanging from your door containing sandwiches and packs of apple juice. It wasn’t that bad, but I think they only had 2 flavors alternating in between days. This was not much of an issue because there were many food establishments outside anyway (Hot Star Chicken and Milk Tea everyday!). Maybe, they can just get more creative next time. 🙂

Everyday breakfast: Apple juice and sandwich

Everyday breakfast: Apple juice and sandwich

View from the window - You  can see the Ximending Red House just right across the street!

View from the window – You can see the Ximending Red House just right across the street!

More establishments beside the hotel

More establishments beside the hotel

All of these are small areas of improvements, but overall, everyone of us had great sleep. 🙂 We also loved the service. The Front desk staff speak very good English and are very helpful. They helped us with directions and even booked a cab for us on our way back to the airport. The guy who arranged for the cab even haggled for a lower fare at $1000NTD vs. $1100NTD we paid on our first day.

I give this hotel 4 out of 5 stars for the great service, location, and clean rooms. Highly recommended for the budget travellers out there. 🙂

Discovering Taiwan – Before you go

Taiwan can become one of the most underrated destinations in Asia. A typical Asian vacation  itinerary would bring you to the Great Wall of China, shopping districts of Hong Kong, Cherry Blossoms of Japan, or the historical temples of Angkor Wat in Cambodia.  But, it just takes the courage and curiosity to finally hit that ‘BOOK’ button in your online hunt for plane tickets to the little charming city of Taipei. I just went back from a 4-day trip with my family and in that short time, Taiwan has blown me away with its big heart and charm. I’m sure you’ll get that too! 🙂

The massive grounds of the Chiang Kai Sek Memorial

The massive grounds of the Chiang Kai Sek Memorial

If you finally decided to pack your bags and fly there, let me help you get started with some of the things you need to prepare (or be prepared for) before you go. This starts off my Taiwan series here in my blog in the coming weeks. 🙂

Taiwan Visa

I understand how a lot of travellers dread the need to apply for an entry Visa to any country. It just takes too much time and hassle to prepare the paperwork and go to the embassy to file everything. Nonetheless, I think Taiwan’s requirements are pretty basic and should be easier to get than its neighbouring countries. Honestly, I haven’t heard of anyone getting denied a tourist visa yet! LOL.

Visa-Free entry

If you are a citizen of India, Thailand, Vietnam, the Philippines, or Indonesia, and happen to have an entry visa, or permanent residence card for the following countries, then you are exempted from the Taiwan entry visa requirement! Yay!

  1. United States
  2. Canada
  3. Japan
  4. United Kingdom
  5. EU Schengen
  6. Australia
  7. New Zealand

I assume passport holders of the countries above are definitely exempted too :). All you have to do is to fill up the online Visa-Free entry form and print out the Travel Authorization Certificate to be presented at the immigration counter when you arrive. You can even do this a day before you leave! Just make sure that your passport and your entry visa are still valid.

Here’s the link to the online application form: https://niaspeedy.immigration.gov.tw/nia_southeast/

Tourist Entry Visa

For those who are not qualified for the exemption, fret not! Taiwan visa application is as easy as 1, 2, 3. You also just need 2-3 hours in the embassy all-in-all from when you submit until you claim your documents.

  1. Complete the required documents:
    • An online Visa Application Form (please access https://visawebapp.boca.gov.tw to fill up the Form and print them out)
    • Two (2) passport size photos 1.5”x2” with white background (taken w/in the last three (3) months)
    • Passport valid for at least six months and old passport showing previous travels
    • Birth Certificate issued by NSO
    • Marriage Contract (if applicable) issued by NSO
    • Certificate of Employment
    • Financial statements of the applicant (Bank Book or Bank Statements)
    • All documents submitted to this office should be Original and with 1 photocopy
  2. Submit personally at the Taiwan embassy. When you get to RCBC plaza, go straight to the ROC Taiwan receptionist to get a number at the lobby. You’ll be then instructed to fall in line, and when it’s time to go up to the 41st floor. There you’ll see an LED queue board to indicate the number being served at which counter.
    • Visa Fee: P2,100.00 (Single entry)/ P4,200.00 (Multiple entry) (NON-REFUNDABLE) payable upon filing of application
    • Processing Time : 3 Working days
    • Expedite Fee for single entry : P1,050.00 / Processing Time: 1 Working Day
    • Expedite Fee for Multiple entry : P2,100.00 / Processing Time: 1 Working Day
    • Filing Time : Monday to Friday 8:45AM to 11:45 AM
  3. Claim your passport after 3 days. Drill is the same with the submission of documents. The only difference is that the releasing happens in the afternoon: Monday to Friday 1: 45PM to 4:45PM

Taipei Economic and Cultural Office in the Philippines

41st Floor, Tower 1, RCBC Plaza

6819 Ayala Avenue, Makati City

Metro Manila, Philippines

Tel No: (63-2) 887-6688

See link for more details: http://www.roc-taiwan.org/PH/ct.asp?xItem=376352&ctNode=4712&mp=272\

Budget and Currency

Good news! I find prices in Taiwan to be very affordable! Currency is Taiwan Dollars (NTD) and exchange rate is 1 USD = 32 NTD or 1 NTD = 1.4 PHP. Our itinerary included all the major sites in Taipei and also a short day trip to Jiufen and Shifen. Our total expenses inclusive of airfare and accommodation is around Php 17,940 per person (~ 400 USD). See breakdown below.

Per Person expenses after the Visa fees for a 4 Days, 4 Nights stay:

Airfare Php 4,500 MNL-TPE Cebu Pacific Round Trip Promo Fare booked back in October 2014
Airport Fees Php 2,270 Airport Tax (Php 1,720) plus Terminal Fee (Php 550)
Hotel Php 4,570 Neijiang Hotel 4 nights Quad room plus extra bed (Php 5,712 per night booked via Agoda)
Transportation Php 1,000 Easycard plus provincial train to Riufang and Taxi to/from airport
Food Php 2,500 A meal can cost from 50 NTD to 300 NTD plus any additional street food that will suit your appetite (i.e. Bubble Milk Tea everyday!)
Entrance Fees Php 100 We only paid for Taipei Zoo entrance, the rest is free! We didn’t go to the Taipei 101 viewing deck, but if you want to, it costs 500 NTD (Php750)
Miscellaneous Php 3,000 Rough estimate of miscellaneous expenses per person
TOTAL Php 17,940 Around 400 USD depending on exchange rate

Climate and Wardrobe

We purposely booked our trip in January so we can enjoy the Winter climate! Average temperature is ~11 to 15 degrees Celsius (and colder on windy nights). A good jacket/coat with a double-layered underneath and closed walking shoes would be appropriate to battle the cold. A scarf and a bonnet would also help. When we went to Maokong Station at the top of the mountain, the temperature dropped below 10 degrees at night putting our knitted gloves to good use!

I imagine humid days during summer at around 30 to 36 degrees Celsius day temperature. Ironically, it would also coincide with the monsoon season (July – September). Coming from another typhoon-prone country, I’m sure it’s a bad time to travel. I assume Spring and Fall temperatures would be somewhere in between at ~20 degrees Celsius.

Hotel and Food

I was torn if we should stay near Taipei Main Station or Ximending. Taipei Main Station is where all major connections to other parts of Taiwan is found (i.e. Taiwan Railway and High-Speed Rail). It is also where most buses will converge. Ximending, on the other hand, is a station away from Taipei Main Station via MRT and where a lot of establishments are found. You can find food and malls everywhere! It features pedestrian alleys which can become crowded at night with food vendors and other trivial items on sale. You can also find street artists and youth dance showdowns at night. 🙂 It’s really an exciting place to be!

We chose Ximending! I realized that transportation is never really an issue in Taipei as long as you have nearby MRT stations. We stayed in Neijiang Hotel, a 3-star hotel located along Neijiang road corner Xining road. I booked late via Agoda 2 days before our trip because of the wait for my family’s Taiwan Visa. Despite of this, Neijiang Hotel did not disappoint! See my detailed review here.

Food in Taiwan can become tricky. It got the best and worst out of me. If you’ve been to Hong Kong, you would recognize a distinct smell of Chinese food being prepared when you pass by small restaurants along alleys. It’s almost the same here. We thought Taiwan food was the best  during our first “snack” when we arrived (2AM midnight snack!), but got sick of the typical menu the days after. We even resorted to McDonald’s to escape the distinct smell and taste of Taiwanese Food in our 2nd and 3rd day! Nonetheless, I think I also had my best experiences here when it comes to street food and Xiao Long Bao! I summarized the Top 10 Must-Eats that we tried in our trip here.

Language and the People

Taiwanese people speak standard Mandarin. Do not expect to find many who speak or even understand English so well. Nonetheless, I noticed that they do understand “How much?” and English numbers especially in markets and train stations.  The good thing is that, street signs, subway maps, and commercial establishments do have English translations. I also find Taiwanese people to be very warm and accommodating. They take the effort to understand what you’re asking and answer in the best way they know (sign language?). 😛

The Hidden Wonders of Surigao Del Sur, Philippines

I originally packed for a 4-day Davao City trip. This is my first time to ever visit a Mindanao province. I expected it to be very similar with Cebu and Manila – malls, markets, traffic, and lots of people. Well, I wasn’t wrong, but the real perks come into 3 things 1) eating lots of FRUITS :), 2) meeting the famous Mayor Rod Duterte, and 3) being accessible to the rest of Mindanao provinces by land. Not bad! 🙂

How lucky can we get to catch Mayor Rod Duterte during our 1st dinner in the city!

How lucky can we get to catch Mayor Rod Duterte during our 1st dinner in the city!

Davao City is approximately 440 miles south of Manila, Philippines. It is accessible by plane or by boat. It is the top city of Mindanao, similar to how Manila is for Luzon, and Cebu for Visayas. Overall, I thought it was ok. We did not go around a lot since it turned out that we will be driving out to Surigao Del Sur on our 2nd day. Surigao sits around 153 miles (246 KM) north of Davao – approximately 4-5 hours by land.

I was anxious leaving Davao for another province. I never knew what to expect from other Mindanao provinces due to the fact that this part of the country is quite infamous in the local news. Passing by towns in  Compostela Valley, Agusan Del Sur, and finally Surigao Del Sur makes me wonder what in the world would I find interesting here.

After 3 hours of zigzag highways and another 2 hours of rough roads (the roads were under contruction!), we finally touched down in Bislig City, home of the majestic Tinuy-an waterfalls. It boasts its name as the widest waterfalls in the country – Niagara of the Philippines. Well, it did not disappoint. I was impressed by how vast (and high) the waterfalls is. 🙂

The grand Tinuy-an. This is the 1st level and main waterfall that measures  95 m wide and 180 ft high.

The grand Tinuy-an. This is the 1st level and main waterfall that measures 95 m wide and 180 ft high.

It was awesome seeing the grandeur of this hidden gem, but it was a lot more exciting to actually go into the foot of the falling waters by bamboo raft. Water falling strong at the top of your head and back does not come close to any hard massage you can get in Manila. LOL.

Bamboo raft used to traverse the foot of the falls.

Bamboo raft used to traverse the foot of the falls.

We rented one of the large cottages at the main camp area of the falls. It was cheap for a daytime rate of Php500 big enough for 12-15 persons (plus minimal entrance fee per head). After a hearty lunch, we set out to explore the 2nd and 3rd levels of the falls. The upper levels are more conducive for photos since you can sit on the rocks by the falls.

2nd level is shallower than the main falls. You can sit by the rocks for some great photos.

2nd level is shallower than the main falls. You can sit by the rocks for some great photos.

I like the 3rd level with this picturesque rock formations.

I like the 3rd level with this picturesque rock formations.

After a few hours and a lot of great photos, we packed up and checked-in at a nearby resort, Sand Bar. It was nothing fancy, so I won’t touch on that in this post.

The next morning, we were out set to discover the Enchanted River in Hinatuan City. By far, this is the best brackish water river I have seen. I am not a good swimmer, but I really could not help but dive into the clear water! Thank God they had life vests for rent! 🙂

A sneak peek into the blue waters of the enchanted river.

A sneak peek into the blue waters of the enchanted river.

Enchanted river diving area. Notice that the water is flowing from the underwater cave in the background.

Enchanted river diving area. Notice that the water is flowing from the underwater cave in the background. Photo credits to Marcial Bolen.

Taken from the other end of the river where the water current goes.

Taken from the other end of the river where the water current flows.

Don’t be deceived by the people swimming happily by the lagoon. When I tried to guess how deep it was, I was surprised to see an abyss-like crater with no clear bottom. Records say the front part is around 25-50 ft deep, but the depth of the inner part inside the cave is still unknown.

Under water shot show an abyss-like crater at the bottom - approximately 25-50 ft deep. Photo credits to Marcial Bolen.

Under water shot shows an abyss-like crater at the bottom – approximately 25-50 ft deep. Photo credits to Marcial Bolen.

By noon, all swimmers were advised to get off the water for fish feeding time. Suddenly, a lot of types of fishes, big and small, came by the surface for food. 🙂 We stayed for a few more hours swimming. I did not want to leave!

I just wished they had better and a lot more bathrooms available. With the long queues, we had to make do taking a “bath” at the deep well outside the changing rooms. By 3PM, we left to drive back to Davao.

Surigao Del Sur will not usually make the bucket list of people as a place they want to visit in the Philippines. I thought that way too before I got here. But, this place just proved me wrong. These 2 hidden wonders make my list as “must-see” places in the country. I would recommend to book your flights to the nearer Butuan City airport. It would take half the time to drive here compared to coming from Davao City. I would definitely not hesitate to come back! 🙂

Anawangin-Nagsasa-Capones and the Great Outdoors

My family loves the outdoors. I grew up used to going to remote places, building camping tents, and sitting by a bonfire as a typical family getaway. I was ecstatic when I learned that my friends and I will be going out for a camping trip in Zambales for a weekend. Yey for me, yay for them- it was their first time.

The municipality of San Antonio in the province of Zambales  lies around 160 kilometers north of Manila, Philippines. It is in the same province where the (in)famous Mt. Pinatubo rests. After the 1991 eruption, locals say that the ash deposits from Mt. Pinatubo accumulated in some remote parts of Zambales forming pristine (grayish) white beaches. What makes these beaches special is the sudden growth of pine trees by the shore – not a very common sight in most tropical beaches in the country. Most famous ones are found in Barangay Pundaquit in San Antonio – Anawangin Cove and Nagsasa Cove. A nearby island meanwhile houses an old lighthouse in a picturesque landscape – Capones Island. These are only accessible by boat from Barangay Pundaquit.
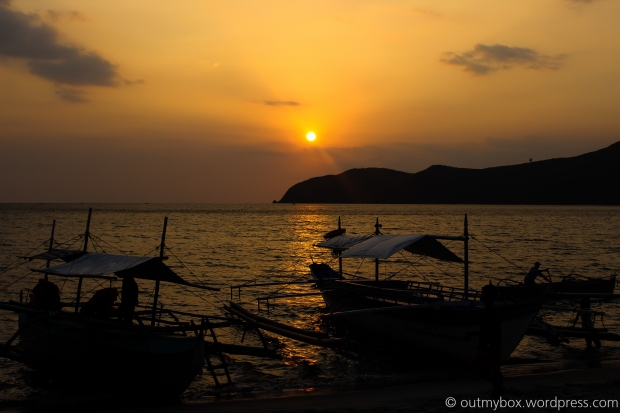
Sunset in Nagsasa Cove. Photo Credits: Simon Floreza

Sunset in Nagsasa Cove. Photo Credits: Simon Floreza

How to Get There

We tried researching for directions from the net, but we ended up using Waze because we were too lazy to refer to our printout everytime we need to take a turn. Believe me, Waze is a life-saver. 🙂 Anyway, for your peace of mind, here’s a rough guide on how to get to the Brgy. Pundaquit Barangay Hall. This is usually where you’ll be meeting your contact for boat rental.

1. Drive towards North Luzon Expressway (NLEX). Depending on where you are coming from in Manila, you can take either the Mindanao entry (nearer from C5), or the Balintawak entry (nearer from EDSA).

2. Drive to the end of NLEX connecting to the Subic-Clark-Tarlac Expressway (SCTEX). Exit to the path going to Subic (beware of the signs!).

3. Enter Subic Bay Metropolitan Authority (SBMA) and just go with the flow (I assume majority of the cars are headed to the SBMA exit :P) The exit is towards the end of Dewey Street. Please be cautious of the road signs if you don’t want to get a traffic violation. If you see a STOP sign, you should stop (not yield). 🙂

4. Once you see the Olongapo Cemetery, turn left and just stay on the road heading towards Iba, Zambales. This is a long drive. You’ll pass by a lot of towns and zigzag roads. Be patient.

5. When you reach the municipality of San Marcelino, drive to the Public Market where you’ll see a Y junction. To the right is heading to Iba, to the left is heading to San Antonio. Of course, you should turn left.

6. Drive until the San Antonio Municipal Hall. This is where it gets tricky and Waze will eventually save you. Turn left to the road heading to Brgy. Pundaquit. They said you’ll see signs, but we didn’t LOL. 😛 If you don’t have Waze, just ask a tricycle driver.

7. Head towards the Pundaquit Barangay Hall. You will see a lot of boat rentals there, but for convenience, I suggest you contact one ahead of time. You should be able to park your vehicle in designated areas depending on your boat rental contact. In our case, we parked in the backyard of Ate Luisa’s house.

What to Bring / Tips for the outdoors

Anawangin or Nagsasa is where you’ll most probably set camp. These are very remote areas – no electricity and no mobile service. Non-potable water for bathing and public toilets are available for free. I think there are around 6-10 cubicles each for Anawangin and Nagsasa (half toilets, half showers). Other than that, all other goods for sale (i.e. potable water, candles, sodas, etc.) are 150%- 200% of the usual price (I swear!). Here are some tips to help you survive your stay and save some money.
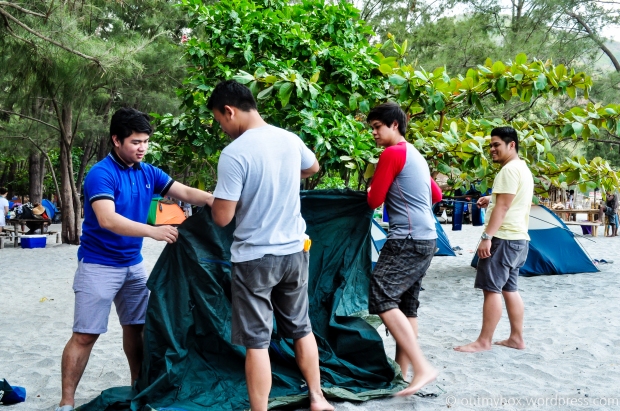
Anawangin Camp Site. The boys busy figuring out how to set up a tent.
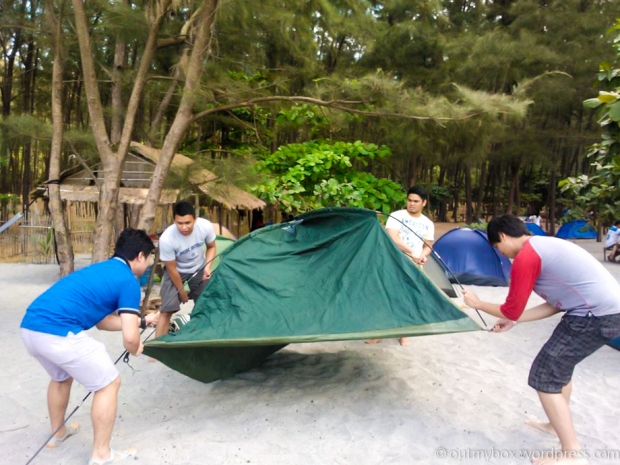
Anawangin Camp Site. The boys busy figuring out how to set up a tent.

Anawangin Camp Site. Finally! 1 tent up, 2 more to go!

Anawangin Camp Site. Finally! 1 tent up, 2 more to go!

1. THINK AHEAD of what you’ll need. If you have your own vehicle, bring an icebox/cooler, a portable stove, drinking water, camping light/flashlight, sleeping tents and beddings, and eating/cooking utensils (disposable or not – plates, spoon, fork, knives, scissors, cups, at least 1-2 cooking pot/pan). Your guide and porters will be helping you carry all these from your vehicle to the boat and to your camp site.

These are all also available for rent from your contact. However, for sanitary issues, I prefer to bring my own. You can also find someone to cook food for you for a price, but in our case, we ended up cooking for ourselves. This should also help you save money. Just to share, we ran out of butane in the morning and we needed to boil water. We asked the store if we can use their stove to boil OUR water in OUR pot – they charged us Php50/$1 (just for 5 minutes use!).

You should also bring powerbanks and waterproof cases. We weren’t able to take as many pictures when we reached Capones since we only brought 1 battery-drained camera from the boat (I didn’t want to risk my DSLR getting wet since we had to swim to the shore!).

2. Bring FOOD. Before we headed to San Antonio, we stopped by the San Marcelino public market to buy raw food for cooking. Our principle is to buy food that is for grilling only (i.e. Pork, Tilapia, Squid, Eggplant plus other veggies we can eat raw). We already brought rice for cooking and drinking water from Manila. We also brought some instant noodles, coffee, and bread for breakfast.

If you want to bring liquor (especially with the boys), you can opt to buy beer. But, you can only bring a handful since you have to carry these to the boat and all. For us, we just brought a few bottles of hard liquor instead (to save space, effort, and time to get drunk LOL). There’s no electricity during the night, so as soon as our bonfire and candle went out, we had no choice but to go to bed.

3. Bring a LIGHT source. I mentioned this in #1, but I want to make sure you do bring a lot of this. We only had 2 flashlights and we forgot to bring candles. We needed to buy from the small store along the beach and it costs Php50/$1 per candle! Talk about profit- I can buy a whole pack of 10 candles for less than Php50 in Manila.

4. Do not book a packaged tour for this trip. It’s really easy to do it yourself. It will save you a lot of money. Believe me. See our cost breakdown towards the end of this post.

5. Decide on your itinerary. At first we only booked our boat for Anawangin and Capones for Php3000 (boat is good for 10 persons). But, we realized we should also go to Nagsasa since we were in the vicinity already.  Our guide agreed to give us Php3500 rate since Nagsasa is farther from Anawangin by at least 30 minutes. Also, book the BIG BOAT. There are smaller boats for rent at a cheaper price, but once you see the notoious waves half way to Anawangin (and even bigger waves to Nagsasa), you’ll realize you should have booked the bigger boat. Here’s our itinerary:
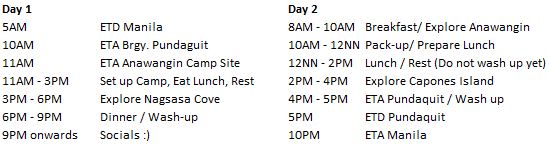
We made a mistake washing up in Anawangin before we went to Capones. We had to get off the boat and swim to the Capones rocky shore because of huge waves. So, we ended up washing up again in Pudaquit before going home.

We made a mistake washing up in Anawangin before we went to Capones. We had to get off the boat and swim to the Capones rocky shore because of huge waves. So, we ended up washing up again in Pudaquit before going home.

BUDGET

Referring to my #4 tip above, here is a breakdown of our “Forecasted” expenses for this trip. We ended up contributing Php1,450 per head – not bad compared to Php2500++ rate of a packaged tour which typically do not include all meals and miscellaneous expenses yet.
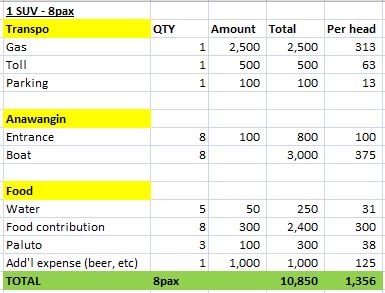
*Boat rental is fixed at Php3000 regardless of # of persons; Actual parking rate given to us is Php150; We did not pay for "Paluto" since we cooked our own food.

*Boat rental is fixed at Php3000 regardless of # of persons; Actual parking rate given to us is Php150; We did not pay for “Paluto” since we cooked our own food.

Contact Information

Here is the contact information of our Boat and guide provider.  I suggest you arrange for your trip at least 1 week before (including all requests – ice, water, or if you’ll be borrowing/renting coolers and tents).

2 Sister’s Boat Rental and Guide – Brgy. Pundaquit, San Antonio, Zambales

Contact Person: Luisa A. Agasa

Contact Numbers: 09196498563 / 09283829947

Overall, I think our weekend getaway was smooth and definitely a blast. Here are more photos from our trip. 🙂
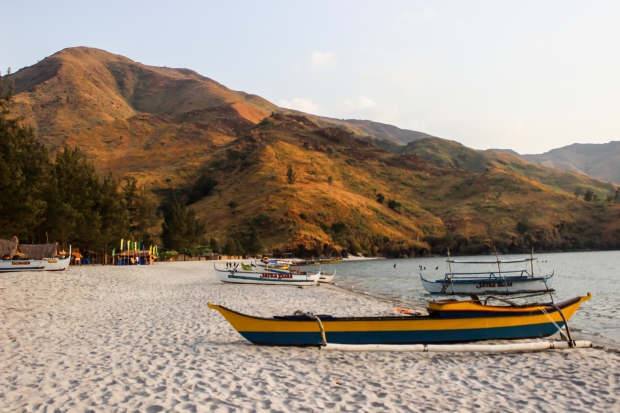
Nagsasa Shoreline

Nagsasa Shoreline. Photo Credits: Simon Floreza
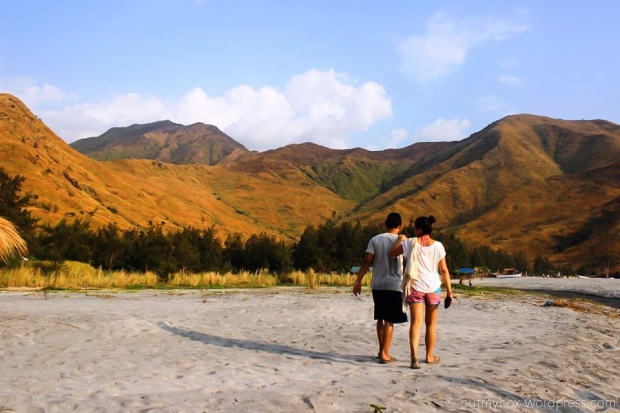
Nagsasa Mountain backdrop

Nagsasa Mountain backdrop. Photo Credits: Simon Floreza
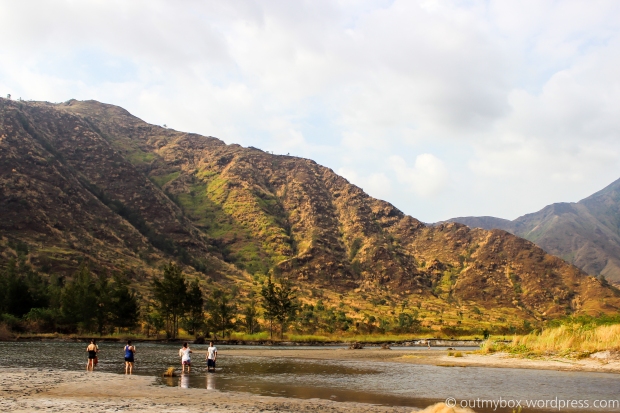
Nagsasa River

Nagsasa River. Photo Credits: Simon Floreza
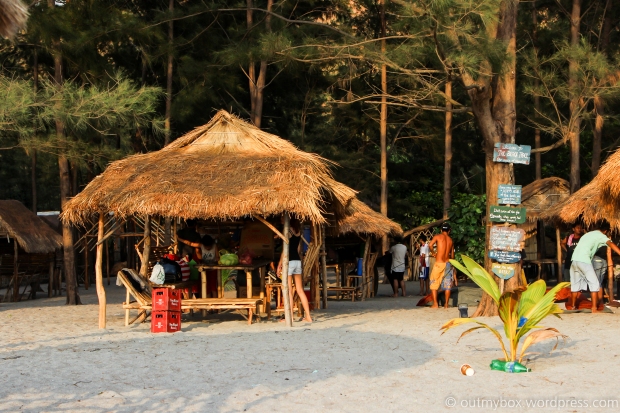
Nagsasa Camp Site

Nagsasa Camp Site. Photo Credits: Simon FLoreza
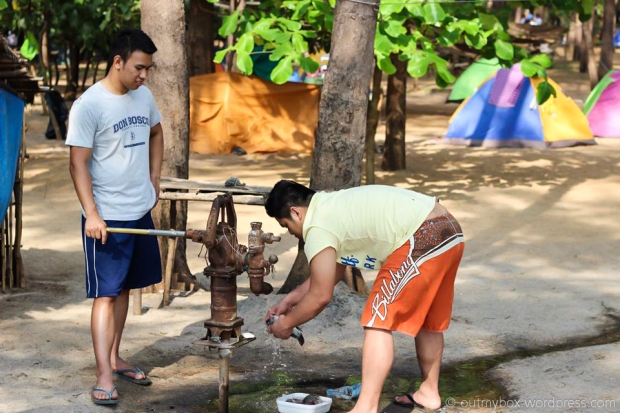
Anawangin Deep Well where we wash our food and utensils
Anawangin Deep Well where we wash our food and utensils

Capones lighthouse
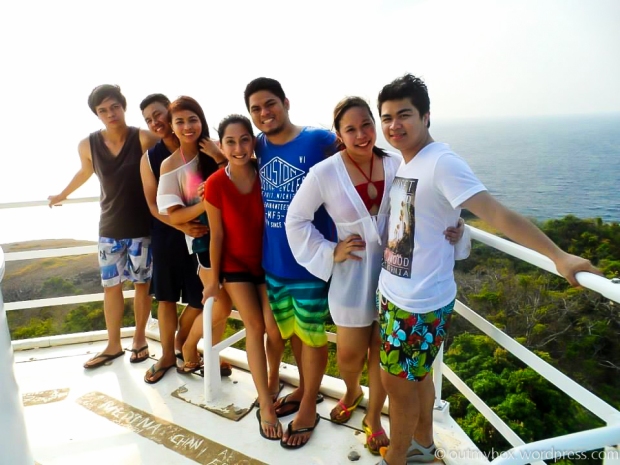
Capones lighthouse

Capones Lighthouse view from the top

Capones Lighthouse view from the top


Liberty: A Visit to the Most Famous Lady in New York

I had to end my last day in the U.S. with a blast. I was lucky to be there on July 4th not only because of the Independence Day fireworks but more importantly, the re-opening of the Liberty Island (where the famous Statue of Liberty stands). It was closed for quite a time for a reconstruction from the damages brought by Hurricane Sandy.

I took the ferry from the side of New Jersey. It costs $17 for the general admission (ferry + Liberty Island grounds). I didn’t get the more expensive exclusive pass to the top of Liberty. I just thought I would be happier to see her from the ground than to see NYC skyline from her head. Besides, I already got awesome pictures from the New Jersey banks! 🙂

New York City skyline as seen from New Jersey.

New York City skyline as seen from New Jersey.

It was a clear and hot summer day. The ferry ride took around 10-15 minutes and gave me the freedom to look at the NYC skyline behind and the Statue of Liberty ahead. Liberty looked so tiny from afar, and it made me more excited the bigger she gets as we get closer to the island.

Tiny Statue of Liberty from the Ferry

Tiny Statue of Liberty from the Ferry

I went straight to the foot of the statue as soon as I got off the ferry (not minding the piercing heat at all!). I was looking up to her with my mouth open in awe – she’s one HUGE lady!

The most famous lady in New York - Statue of Liberty

The most famous lady in New York – Statue of Liberty

I got myself a pair of headphones they are giving out by the entrance. It was a recording about the history of the Statue and some other fun facts. I put it on, bought a cold Vanilla milkshake, and sat like a child on one of the benches behind the statue.

Liberty Island

Liberty grounds


I knew right then that that would be one of my last moments breathing American air in almost 2 months journey away from home. I remember how dramatic the scene was in my head. LOL 🙂  In a matter of hours, I would be back in Manila living my reality. I’m glad to see this part of the world. Hopefully, one of these days, I’ll be coming back to see more of you America (and btw, nice to meet you Liberty!).  🙂

The Art of Looking Up in New York City

There are only a few places in this world that could actually change anybody’s life. New York City is one of those places. It’s a combination of the good, the bad, and everything else in between that would leave you reflecting of how you’ve been and how you would want to be.

I came here to visit my uncle and his family for a week. We drove to Washington and New Jersey in the first few days, which left me only with 3 days to explore NYC before my flight back to Manila. I swore to take a day out alone to experience the city – stroll in the sidewalks, take the subway, eat by central park, and watch city lights along Times Square.

The skies were gloomy and the traffic was bad (as usual). I walked for several blocks aiming for a quick visit to the famous sites – World Trade Center, Grand Central Terminal, Central Park, and Times Square. It’s funny how I thought it was just that simple. Well, I have a very good sense of direction (so I wasn’t concerned about that). But, a few minutes later, it rained – as in POURING RAIN.

New York City traffic

New York City traffic

Alicia Keys’ Empire State of Mind kept playing in my head. Nothing can stop me. I decided to tie up my wet and messed up hair and just move on. I got to the subway glanced by the map and rode my first ever train ride in NYC.

Before anything else, I had to pay respect to the thousands who lost their lives in the 9/11 attacks. The old North and South towers of the World Trade Center are now converted into the 9/11 memorial. A new World Trade Center stands taller and prouder just nearby.

9/11 Memorial.

9/11 Memorial.

My next stop was the Grand Central Terminal which is a train-ride away. It is situated on the eastern part of the city and isn’t hard to find. It’s like I traveled to different time the moment I entered the halls. The ceiling was so high and grand filled with very cool chandeliers. I almost wanted to wear a ball gown and waltz around the place – Disney princess style. LOL 🙂

Grand Central Terminal ceiling filled with chandeliers

Grand Central Terminal ceiling filled with chandeliers

Ticket booths busy with travelers on queue.

Ticket booths busy with travelers on queue.

Just a few blocks away sits the Central Park. It was definitely a change in scenery the closer I get to it. The air seems to get fresher and the usual sights of skyscrapers turned into towering trees. How I wish I could stay there longer and write this blog entry while sitting in one of those benches!

Central Park

Central Park

The sun was finally setting by 9PM. I had to haggle with myself on which site I want to see next given my limited time. I realized I can’t really miss the buzzing night life in Times Square. I had to forego some other places which I already passed by the other days -Rockefeller Center, Grand Soho, Radio City, Brooklyn Bridge etc. I would come back to see those places – I promise!

Sunset at 9PM!

Sunset at 9PM!

Mesmerizing lights at Times Square, New York City

Mesmerizing lights at Times Square, New York City

A talented artist along the sidewalk (spray) paints a different take of the NYC skyline.

A talented artist along the sidewalk (spray) paints a different take of the NYC skyline.

Empire State Building - lit in Red, White, and Blue in time for the July 4th independence day celebration.

A view of the Empire State Building on my way home – lit in Red, White, and Blue in time for the July 4th independence day celebration. *taken with my phone. Sorry for the resolution!

Walking around New York City is all about looking up – wandering from skyscraper to skyscraper optimistic on the crazy yet exciting ride ahead. I went home to Jersey City at around 11PM still feeling the adrenaline rush NYC brought me. It made me realize the endless possibilities I have wherever I go, whoever I am. NYC is not the kind of jungle to be afraid of. Maybe I’ll just let Alicia Keys sing it, it’s a “concrete jungle where dreams are made of…these streets will make you feel brand new, Big lights will inspire you. Let’s hear it for New York, New York, New York.”

Picturesque Summer in the Capital D.C.

It’s not everyday that I would ever see the United States Capitol peeking through the trees ahead of me as I wait for the traffic signal turn green. I remember how surreal, picturesque, and cinematic it felt. At last, I was in the final and most exciting leg of my Summer 2013 trip – America.

Image

Roads were very familiar and appealed very well for the movie geek in me. The summer heat was piercing through my skin, but I couldn’t care less. I ran around the streets hand in hand with my 7-year-old and 5-year-old cousins.

There’s no better way to start my Washington, D.C. summer stroll than to see the White house. I was surprised how tiny it looks in real life. I imagined it to be a lot bigger and overwhelming, but it seemed to be homier than anything else. The vibrant green lawns reminded me of my university back in Manila.

White House


The fences were busy with families taking pictures and kids climbing the railings – maybe hoping Barrack Obama would peek through the windows to say Hi. 🙂 (Okay, that was me hoping).

After a few great shots, we went on walking. Not very far away are some notable architecture. We passed by the Dwight Eisenhower Executive Building, and some very cool bikes for rent.

Dwight Eisenhower Executive Building sporting the glorious star-spangled banner.

Dwight Eisenhower Executive Building sporting the glorious star-spangled banner.

Bike


It was very convenient to know that other famous landmarks are very close by. Of course, I came here to see Lincoln and Washington Monuments. First, I had to prove that Lincoln statue did not turn into an ape as it did in the Planet of the Apes. Second, I had to check that the Washington Memorial is still in tact after the very aggressive attack in Olympus has Fallen. LOL 🙂 Luckily, both of them were just doing fine and lived up to my expectations as to how scenic they should be.

Lincoln sitting tall on his throne.

Lincoln sitting tall on his throne.

Washington Memorial under restoration. Ducks must be enjoying their stroll too!

Washington Memorial under restoration. The ducks must be enjoying their stroll too!

It was close to 6PM, and it felt very strange seeing the sun still all lit up. We had to go back to the hotel and continue the sight-seeing the next day. I kept on waiting by the window guessing when the sun would set. At last it was on it’s way down by 8:30 PM. Back at home, it’s pitch dark by 7PM.Hotel window

The next day came by like a breeze. We had a short trip to the Museum of Natural History and also some neighboring buildings like the Archives of the United States. The cinematic pre-historic Elephant and T-Rex Fossils were the highlights of my brief visit around the museum. In my head was Ben Stiller wandering through the corridors chasing creatures which came to life at night. 🙂

Natural History


Classic American Architecture of the Archives of the United States Building

Classic American Architecture of the Archives of the United States Building

I admire how everything is preserved in this small federal district. The landmarks are very well-planned and taken care of. It’s funny how I say “I’ve been there!” or “I’ve seen those!” whenever I watch movies here in Manila. But, I guess, in my short time in the U.S. Capital, what’s more important is how I am now able to understand the value of freedom, democracy, and good governance.

Exploring the Old and the New Panama City

My visa-free entry to Costa Rica was only good for 30 days. I had to fly out to neighboring Panama for a few days to renew my length of stay. I have to admit how anxious I felt while booking my ticket to another Latin America country. Aside from beauty pageants, I only heard of Panama in TV shows/Movies such as Prison Break, Next 3 Days, and Locked Up Abroad – not really a good introduction to the country. LOL. 🙂

I arrived on a Thursday. I had to go to some work-related meetings before I could really breathe real Panama air. I was undecided on what to love about the country on the first couple of days. It was hard to get a cab and haggle for a reasonable fare. They don’t have taxi meters and I only knew a few essential Spanish phrases such as “Habla Espanol un poquito.” 😛 Food was expensive and limited since I only ate in the hotel. Their currency is technically the Balboa, but in the real world – it’s just U.S. dollars. The only redeeming factor I remember was the jaw-dropping view I had from my window in the office. I felt so inspired to look far to the Pacific coast and watch giant birds flew by. I wished that was my view back in the Manila office.

At last, Saturday came and I braced myself for the Hop On Hop Off booking I made to see Panama City. I really wanted to give the city a second chance. This officially marked my first Dora-the-explorer moment in a city I don’t know with a language I don’t speak. I was ecstatic and left the hotel as early as 8AM equipped with my Latin America travel essentials.

Latin America travel essentials - Spanish phrase dictionary, Hop On Hop Off map, and my beloved Nikon camera.

Latin America travel essentials – Spanish phrase dictionary, Hop On Hop Off city map, and my beloved Nikon camera.

My Hop on Hop off ticket was a 24-hour pass which already covered the Canal Route, Amador Causeway, and Casco Antiguo – figuratively speaking, the old and the new Panama City. The buses are very easy to see (Red 2-story buses) and have plenty of stops in famous landmarks. I started in the Multicentro Mall bus stop. Once you get aboard, you’ll get a flyer/map and some disposable earphones which you should plug into the seats to hear the recording for every site you visit. Yeah, I felt like a 3rd grader going to a field trip. But, hey, this is the most economical and easiest way to get around the city in 1 day. The bus never gets full anyway. At least, I get to “hop off” only at the places I was interested into. 🙂

Hop On Hop Off Bus

My first stop was the famous Panama Canal. I paid the Visitor entrance fee of $5 which gives access to the Visitor center/view deck at one of the top floors. This was all I needed, I didn’t avail of the more expensive fee which gives access to a theater pass to watch some educational videos. I didn’t really understand how special the Canal was at first glance – until I saw how huge it was to fit large ships passing by.

Panama CanalCanal

After watching the Canal gates open and close for ships passing through, and asking some random strangers take my picture, I went back to the drop off point to wait for the next bus. It took forever (almost an hour of waiting). My next bus took a couple of stops to some malls for people interested to shop. I wasn’t into shopping that day, so I patiently waited for an hour more to get to my next destination – the Amador Causeway. I strategically timed my visit close to lunch because I heard of the fancy restaurants by the harbor overlooking the Panama city skyline.

The Amador Causeway is a long road that connects the Panama city mainland and 4 islands in the Pacific ocean. These islands were originally U.S. Military bases used to protect the Panama canal entrance. Now, these were transformed into tourist attractions with lots of museums and restaurants by the water. I was riding at the top level of the bus when the rain started pouring. I had to change seats to avoid getting wet. I couldn’t get my camera out to capture how beautiful the causeway was. You could see the Pacific ocean in both sides of the road. I got off on Isla Flamenco which housed most of the restaurants in the islands. The outdoor tables were wet so I had to choose an indoor restaurant with view. My trip to this place didn’t disappoint. I ate seafood (a break after having beans and rice for a long time) overlooking the Panama skyline and I suddenly was in heaven.

Isla FlamencoPanama Skyline

It’s funny how ironic this city is. There are so many new skyscrapers and fancy restaurants around, but at the same time, there are also a lot of historical places to visit. My next stop was the place I was most excited about – Casco Antiguo. I’m such a sucker for nice-looking historical places with lots of preserved architecture. Getting off the Plaza Quinto Centenario, I already could feel history at my feet. I walked pass brick roads to visit known landmarks.

First off my list was the Alter De Oro (Golden Altar) of the Iglesia de San Jose. It took a while finding this place. There were a lot of churches in the vicinity and I had to go inside each to know if that was the right church (I passed by 4 churches in total). I felt some unexplained goosies as I enter each church, more so when I finally found Iglesia De San Jose. The altar was so grand and expensive-looking. I was impressed by how much they were able to preserve an altar of that worth.

Altar De Oro

Walking around the streets was a feast to the eyes. As I tried to find the French Embassy as my next destination, I couldn’t help but to take photos of the architecture in the area.

Brick roads and Spanish architecture

Brick roads and Spanish architecture

Casco ruin

At last, I found the French Embassy. I just learned that it was imperative to have a picture of this pole in the embassy when you visit Casco Antiguo. It was also wonderful to see a lot of items being sold in the sidewalks including the indigenous Molo (cloth art work native to Panama). I proudly bought 1 Molo to bring back with me home.

French Embassy

French Embassy


Mola art works hanging by the French Embassy walls.

Mola art works hanging by the French Embassy walls.

Old Vehicle plate numbers

Old Vehicle plate numbers

I was tired of walking so I decided to buy some gelato in one of the small cafes by the sidewalk before going back to the bus stop. Then and there I realized how special Panama was. I sat there eating my dark chocolate gelato watching people walk by with the brick roads beneath my feet and Panamanian history before my eyes. I would say this was one of the best parts of my trip 7000 miles away from home. 🙂